by Maurycy Markowski, Raquel Soares De Almeida, Robert McMurray
This tutorial shows you how to replace the default data storage mechanism for ASP.NET Identity with EntityFramework (SQL client provider) with a MySQL provider.
The following topics will be covered in this tutorial:
- Creating a MySQL database on Azure
- Creating an MVC application using Visual Studio 2013 MVC template
- Configuring EntityFramework to work with a MySQL database provider
- Running the application to verify the results
At the end of this tutorial, you will have an MVC application with the ASP.NET Identity store that is using a MySQL database that is hosted in Azure.
Creating a MySQL database instance on Azure
- Log in to the Azure Portal.
- Click NEW at the bottom of the page, and then select STORE:

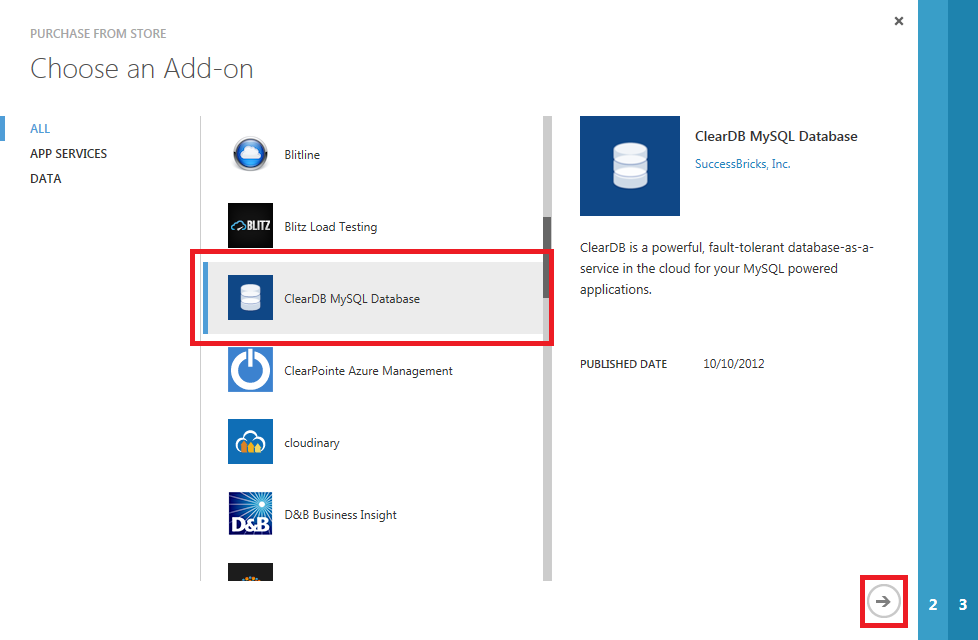
- In the Choose and Add-on wizard, select ClearDB MySQL Database, and then click the Next arrow at the bottom of the frame:[Click the following image to expand it. ]
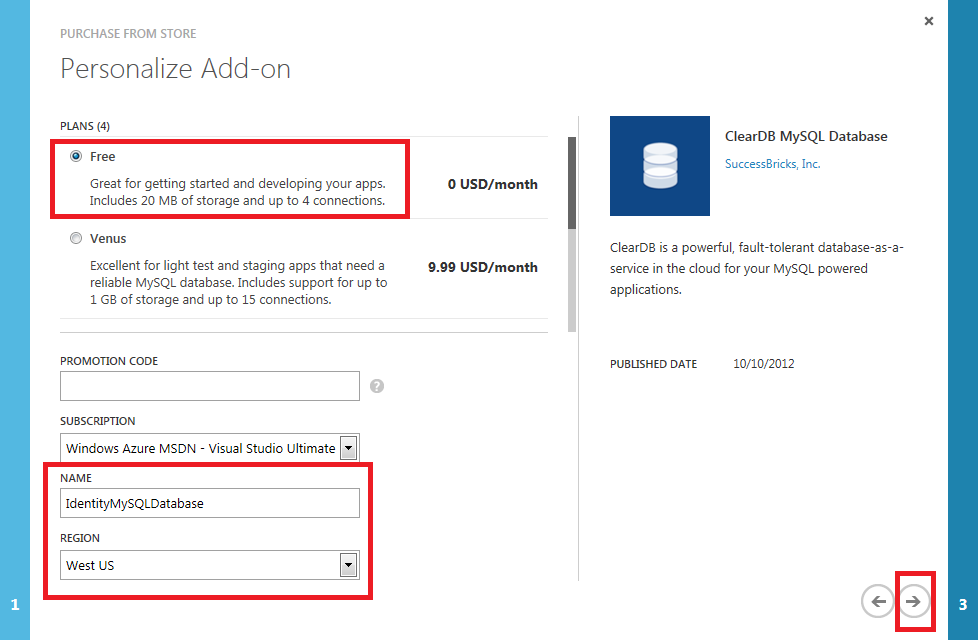
- Keep the default Free plan, change the NAME to IdentityMySQLDatabase, select the region that is nearest to you, and then click the Next arrow at the bottom of the frame:[Click the following image to expand it. ]

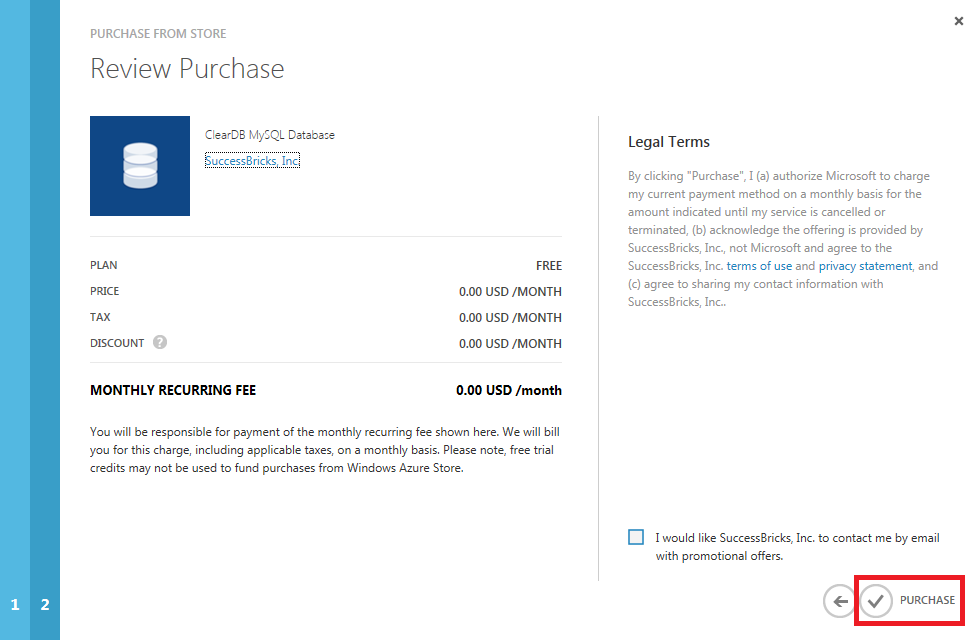
- Click the PURCHASE checkmark to complete the database creation.[Click the following image to expand it. ]

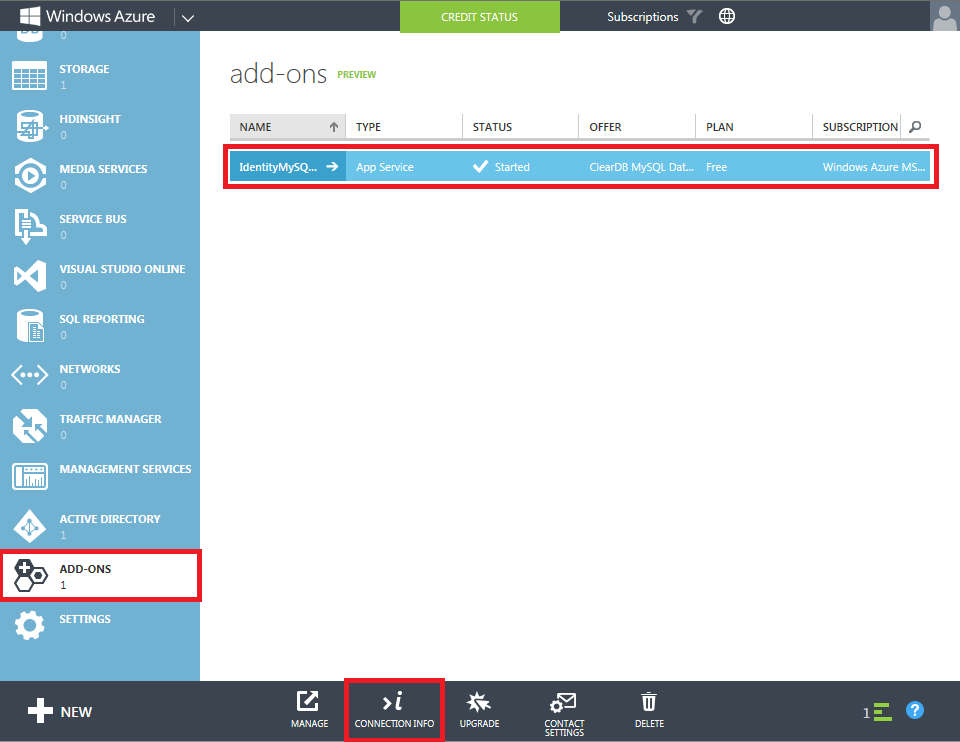
- After your database has been created, you can manage it from the ADD-ONS tab in the management portal. To retrieve the connection information for your database, click CONNECTION INFO at the bottom of the page:[Click the following image to expand it. ]

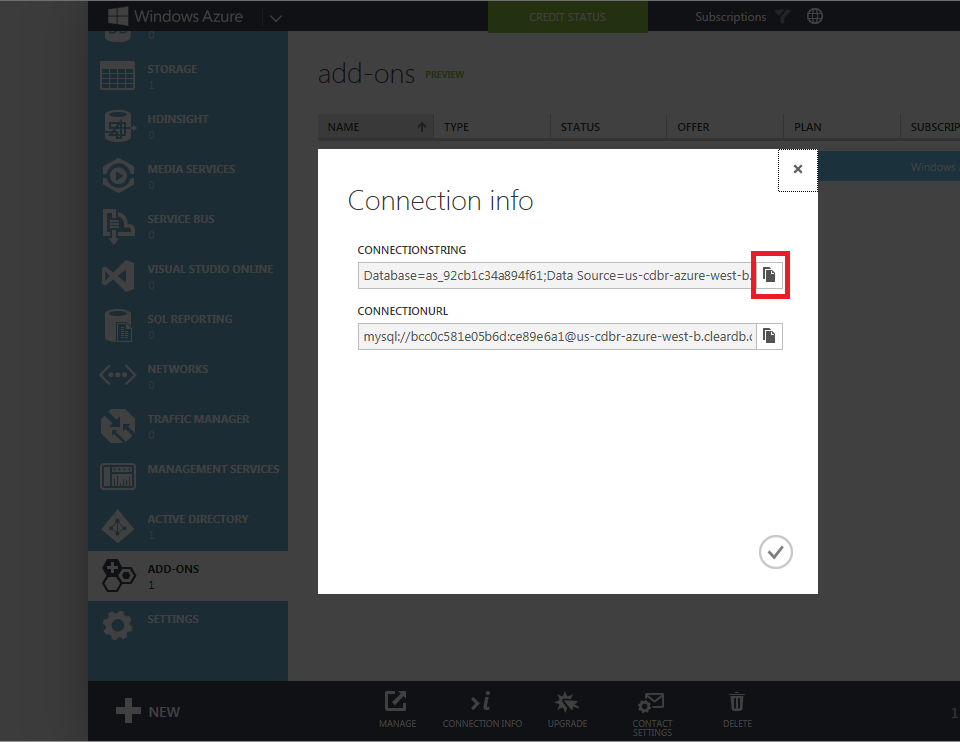
- Copy the connection string by clicking on the copy button by the CONECTIONSTRING field and save it; you will use this information later in this tutorial for your MVC application:[Click the following image to expand it. ]


Creating an MVC application project
To complete the steps in this section of the tutorial, you will first need to install Visual Studio Express 2013 for Web or Visual Studio 2013. Once Visual Studio has been installed, use the following steps to create a new MVC application project:
- Open Visual Studio 2103.
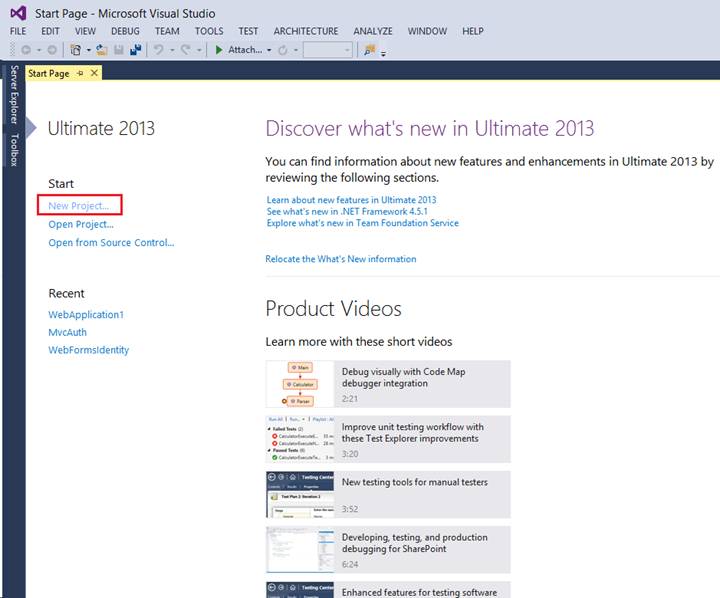
- Click New Project from the Start page, or you can click the File menu and then New Project:[Click the following image to expand it. ]
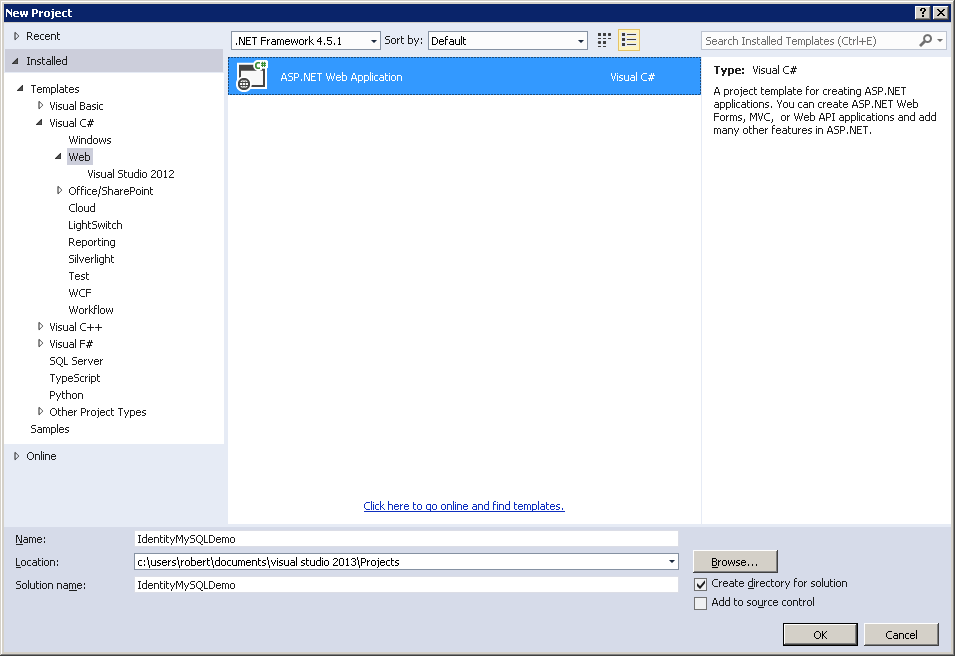
- When the New Project dialog box is displayed, expand Visual C# in the list of templates, then click Web, and select ASP.NET Web Application. Name your project IdentityMySQLDemo and then click OK:[Click the following image to expand it. ]

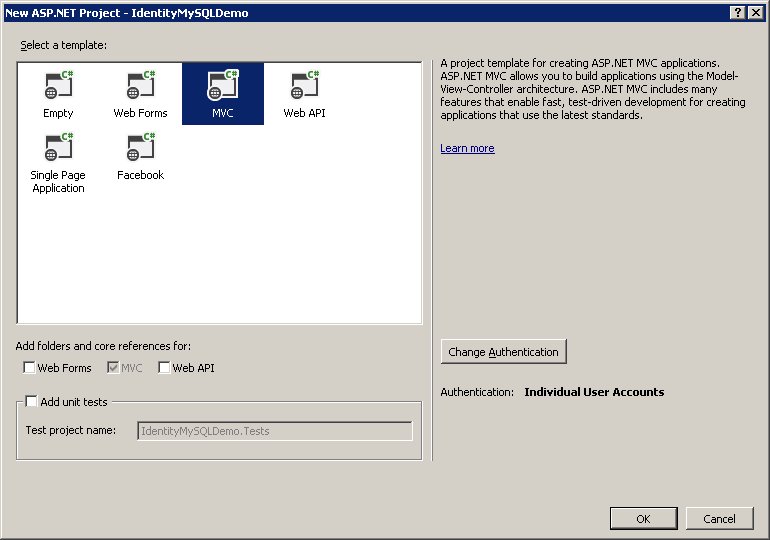
- In the New ASP.NET Project dialog, select the MVC templatewith the default options; this will configure Individual User Accounts as the authentication method. Click OK:[Click the following image to expand it. ]


Configure EntityFramework to work with a MySQL database
Update the Entity Framework assembly for your project
The MVC application that was created from the Visual Studio 2013 template contains a reference to the EntityFramework 6.0.0 package, but there have been updates to to that assembly since its release which contain significant performance improvements. In order to use these latest updates in your application, use the following steps.
- Open your MVC project in Visual Studio 2013.
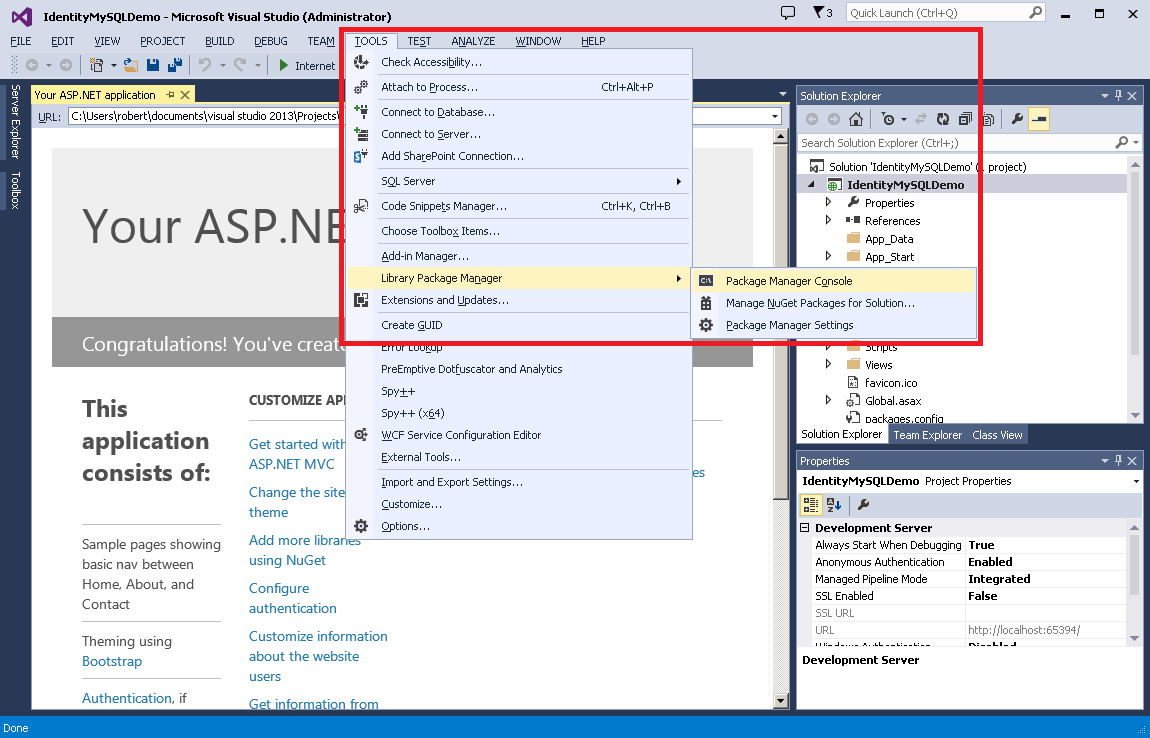
- Click TOOLS, then click Library Package Manager, and then click Package Manager Console:[Click the following image to expand it. ]
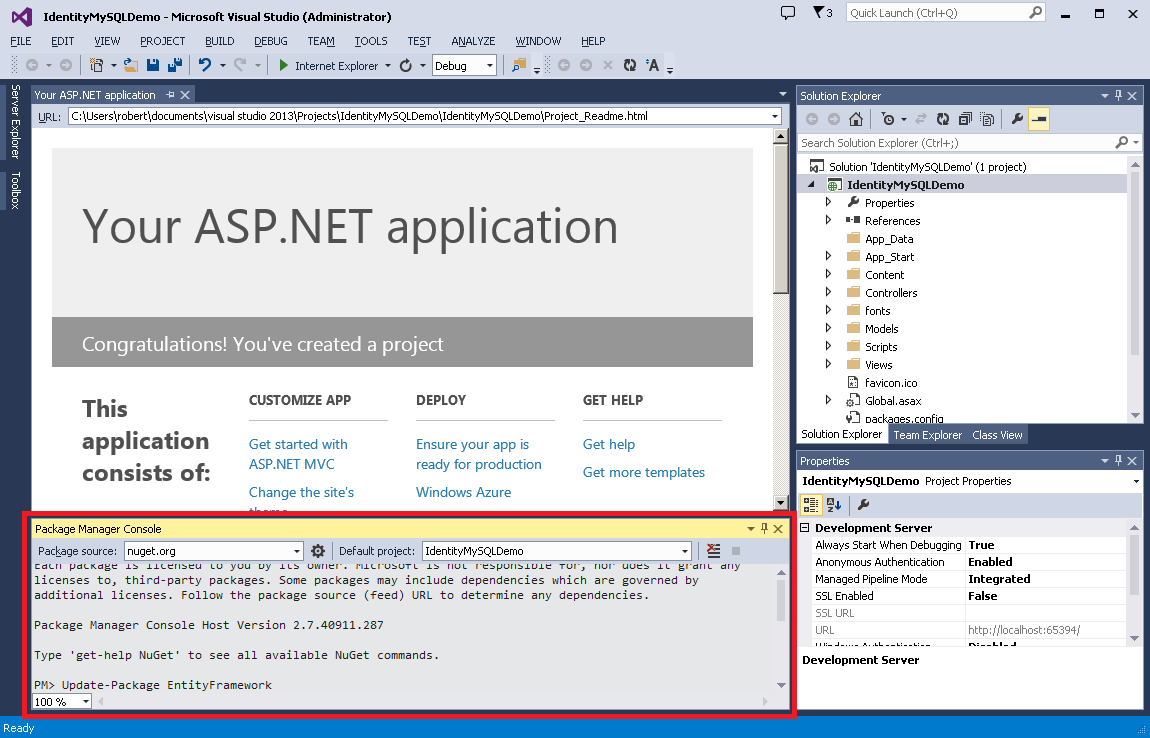
- The Package Manager Console will appear in the bottom section of Visual Studio. Type „Update-Package EntityFramework” and press Enter:[Click the following image to expand it. ]


Install the MySQL provider for EntityFramework
In order for EntityFramework to connect to MySQL database, you need to install a MySQL provider. To do so, open the Package Manager Console and type „Install-Package MySql.Data.Entity -Pre„, and then press Enter.
Note
This is a pre-release version of the assembly, and as such it may contain bugs. You should not use a pre-release version of the provider in production.
[Click the following image to expand it.]

Making project configuration changes to the Web.config file for your application
In this section you will configure the Entity Framework to use the MySQL provider that you just installed, register the MySQL provider factory, and add your connection string from Azure.
Note
The following examples contain a specific assembly version for MySql.Data.dll. If the assembly version changes, you will need to modify the appropriate configuration settings with the correct version.
- Open the Web.config file for your project in Visual Studio 2013.
- Locate the following configuration settings, which define the default database provider and factory for the Entity Framework:
XML
-
<entityFramework> <defaultConnectionFactory type="System.Data.Entity.Infrastructure.LocalDbConnectionFactory, EntityFramework"> <parameters> <parameter value="v11.0" /> </parameters> </defaultConnectionFactory> <providers> <provider invariantName="System.Data.SqlClient" type="System.Data.Entity.SqlServer.SqlProviderServices, EntityFramework.SqlServer" /> </providers> </entityFramework> - Replace those configuration settings with the following, which will configure the Entity Framework to use the MySQL provider:
XML
-
<entityFramework> <providers> <provider invariantName="MySql.Data.MySqlClient" type="MySql.Data.MySqlClient.MySqlProviderServices, MySql.Data.Entity"/> </providers> </entityFramework> <system.data> <DbProviderFactories> <remove invariant="MySql.Data.MySqlClient"></remove> <add name="MySQL Data Provider" invariant="MySql.Data.MySqlClient" description=".Net Framework Data Provider for MySQL" type="MySql.Data.MySqlClient.MySqlClientFactory, MySql.Data, Version=6.7.2.0"/> </DbProviderFactories> </system.data> - Locate the <connectionStrings> section and replace it with the following code, which will define the connection string for your MySQL database that is hosted on Azure (note that providerName value has also been changed from the original):
XML
-
<connectionStrings>
  <add name="DefaultConnection"
    providerName="MySql.Data.MySqlClient"
    connectionString="[Insert your ConnectionString from Azure here]"/>
</connectionStrings>
Adding custom MigrationHistory context
Entity Framework Code First uses a MigrationHistory table to keep track of model changes and to ensure the consistency between the database schema and conceptual schema. However, this table does not work for MySQL by default because the primary key is too large. To remedy this situation, you will need to shrink the key size for that table. To do so, use the following steps:
- The schema information for this table is captured in a HistoryContext, which can be modified as any other DbContext. To do so, add a new class file named MySqlHistoryContext.cs to the project, and replace its contents with the following code:
C#
-
using System.Data.Common; using System.Data.Entity; using System.Data.Entity.Migrations.History; namespace IdentityMySQLDemo { public class MySqlHistoryContext : HistoryContext { public MySqlHistoryContext( DbConnection existingConnection, string defaultSchema) : base(existingConnection, defaultSchema) { } protected override void OnModelCreating(DbModelBuilder modelBuilder) { base.OnModelCreating(modelBuilder); modelBuilder.Entity<HistoryRow>().Property(h => h.MigrationId).HasMaxLength(100).IsRequired(); modelBuilder.Entity<HistoryRow>().Property(h => h.ContextKey).HasMaxLength(200).IsRequired(); } } } - Next you will need to configure Entity Framework to use the modified HistoryContext, rather than default one. This can be done by leveraging code-based configuration features. To do so, add new class file named MySqlConfiguration.cs to your project and replace its contents with:
C#
-
using System.Data.Entity;

namespace IdentityMySQLDemo
{
  public class MySqlConfiguration : DbConfiguration
  {
    public MySqlConfiguration()
    {
      SetHistoryContext(
      "MySql.Data.MySqlClient", (conn, schema) => new MySqlHistoryContext(conn, schema));
    }
  }
}
Creating a custom EntityFramework initializer for ApplicationDbContext
The MySQL provider that is featured in this tutorial does not currently support Entity Framework migrations, so you will need to use model initializers in order to connect to the database. Because this tutorial is using a MySQL instance on Azure, you will need need to create a custom Entity Framework initializer.
Note
This step is not required if you are connecting to a SQL Server instance on Azure or if you are using a database that is hosted on premises.
To create a custom Entity Framework initializer for MySQL, use the following steps:
- Add a new class file named MySqlInitializer.cs to the project, and replace it’s contents with the following code:
C#
-
using IdentityMySQLDemo.Models; using System.Data.Entity; using System.Data.Entity.Infrastructure; using System.Linq; namespace IdentityMySQLDemo { public class MySqlInitializer : IDatabaseInitializer<ApplicationDbContext> { public void InitializeDatabase(ApplicationDbContext context) { if (!context.Database.Exists()) { // if database did not exist before - create it context.Database.Create(); } else { // query to check if MigrationHistory table is present in the database var migrationHistoryTableExists = ((IObjectContextAdapter)context).ObjectContext.ExecuteStoreQuery<int>( string.Format( "SELECT COUNT(*) FROM information_schema.tables WHERE table_schema = '{0}' AND table_name = '__MigrationHistory'", "[Insert your database schema here - such as 'users']")); // if MigrationHistory table is not there (which is the case first time we run) - create it if (migrationHistoryTableExists.FirstOrDefault() == 0) { context.Database.Delete(); context.Database.Create(); } } } } } - Open the IdentityModels.cs file for your project, which is located in the Models directory, and replace it’s contents with the following:
C#
-
using Microsoft.AspNet.Identity.EntityFramework;
using System.Data.Entity;

namespace IdentityMySQLDemo.Models
{
  // You can add profile data for the user by adding more properties to your ApplicationUser
  // class, please visit http://go.microsoft.com/fwlink/?LinkID=317594 to learn more.
  public class ApplicationUser : IdentityUser
  {
  }

  public class ApplicationDbContext : IdentityDbContext<ApplicationUser>
  {
    static ApplicationDbContext()
    {
      Database.SetInitializer(new MySqlInitializer());
    }

    public ApplicationDbContext()
      : base("DefaultConnection")
    {
    }
  }
}
Running the application and verifying the database
Once you have completed the steps in the preceding sections, you should test your database. To do so, use the following steps:
- Press Ctrl + F5 to build and run the web application.
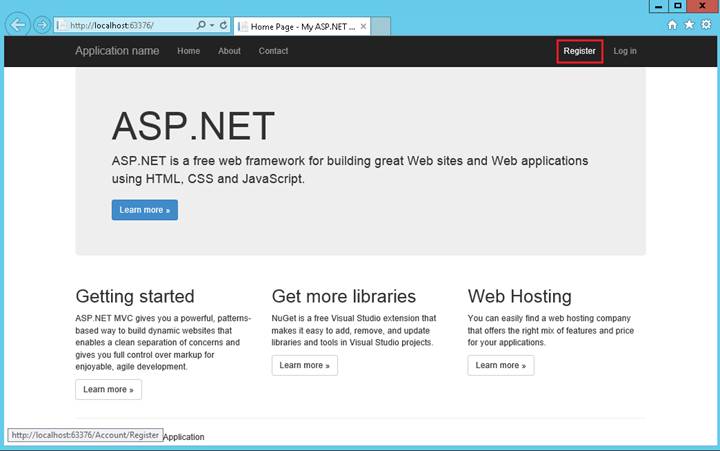
- Click the Register tab on the top of the page:[Click the following image to expand it. ]

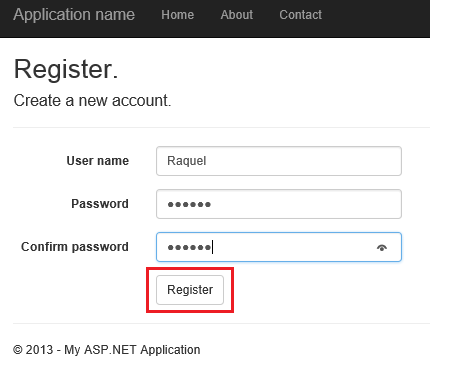
- Enter a new user name and password, and then click Register:[Click the following image to expand it. ]
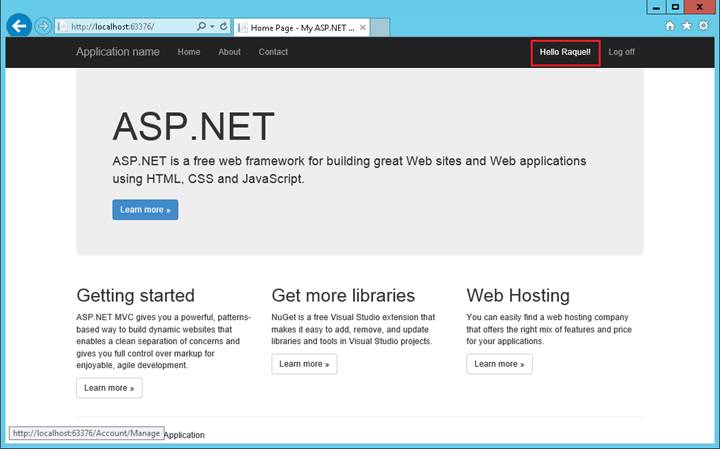
- At this point the ASP.NET Identity tables are created on the MySQL Database, and the user is registered and logged into the application:[Click the following image to expand it. ]


Installing MySQL Workbench tool to verify the data
- Install the MySQL Workbench tool from the MySQL downloads page
- In the installation wizard: Feature Selection tab, select MySQL Workbench under applications section.
- Launch the app and add a new connection using the connection string data from the Azure MySQL database you created at the begging of this tutorial.
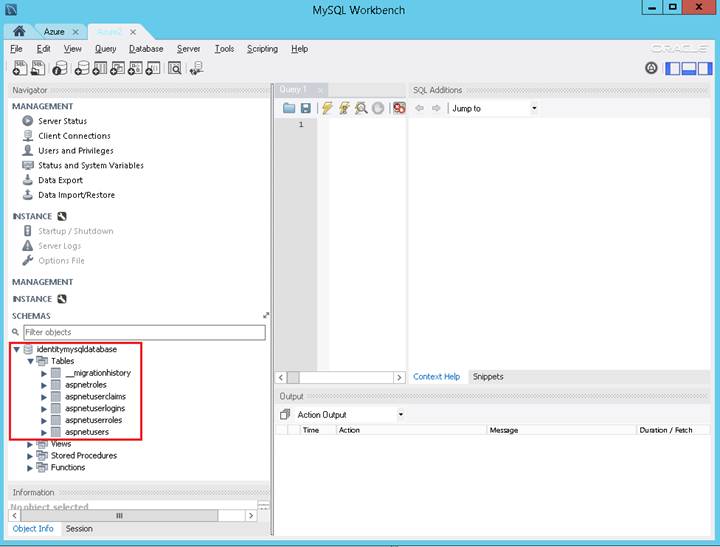
- After establishing the connection, inspect the ASP.NET Identity tables created on the IdentityMySQLDatabase.
- You will see that all ASP.NET Identity required tables are created as shown in the image below:[Click the following image to expand it. ]

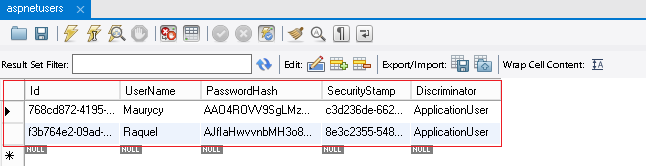
- Inspect the aspnetusers table for instance to check for the entries as you register new users.[Click the following image to expand it. ]